Bulk tagging in CMS Lite
Learn how to tag multiple pages or assets in CMS Lite in a single action.
On this page
Overview of bulk tagging
Bulk Tagging offers the ability to populate metadata and/or tags to multiple nodes (pages) or assets in one action. This feature can be used to:
- Apply terms to all fields (for new content/assets)
- Add additional terms to a field
- Replace existing content with a new term
- For example, updating the Creator field of all content/assets when a Ministry name change occurs
There are no mandatory fields when bulk tagging; therefore, a user can choose which fields to update without encountering validation errors. However, the result must include terms in all mandatory fields, or the page(s) cannot be published. This does not apply to Asset Metadata, as there are no validation requirements.
Hover over the ? icon to view metadata field descriptions.

Key considerations for bulk tagging
Be careful
It is strongly advised that bulk tagging be done as an isolated action to ensure that another user is not currently modifying the impacted nodes.
Tagging limits
Bulk tagging is limited to 1,000 items at one time.
Use unique keywords
For optimal search results, unique keywords and descriptions should be applied to individual pages. Bulk tagging pages with the same keywords and descriptions is not recommended.
Ask questions
It is imperative that you understand the process before proceeding, especially when updating terms in existing content/assets.
If you have any questions, please contact CMSLitetraining@gov.bc.ca
How to bulk tag content
- From the Content Navigation pane, choose one of the following options:
- Check the box
 next to the applicable node(s) and select the Bulk Tag Metadata and Terms to Selected, or
 - Check the box
 next to the highest level node and select the Bulk Tag Metadata and Terms to Selected and Their Children
- Check the box
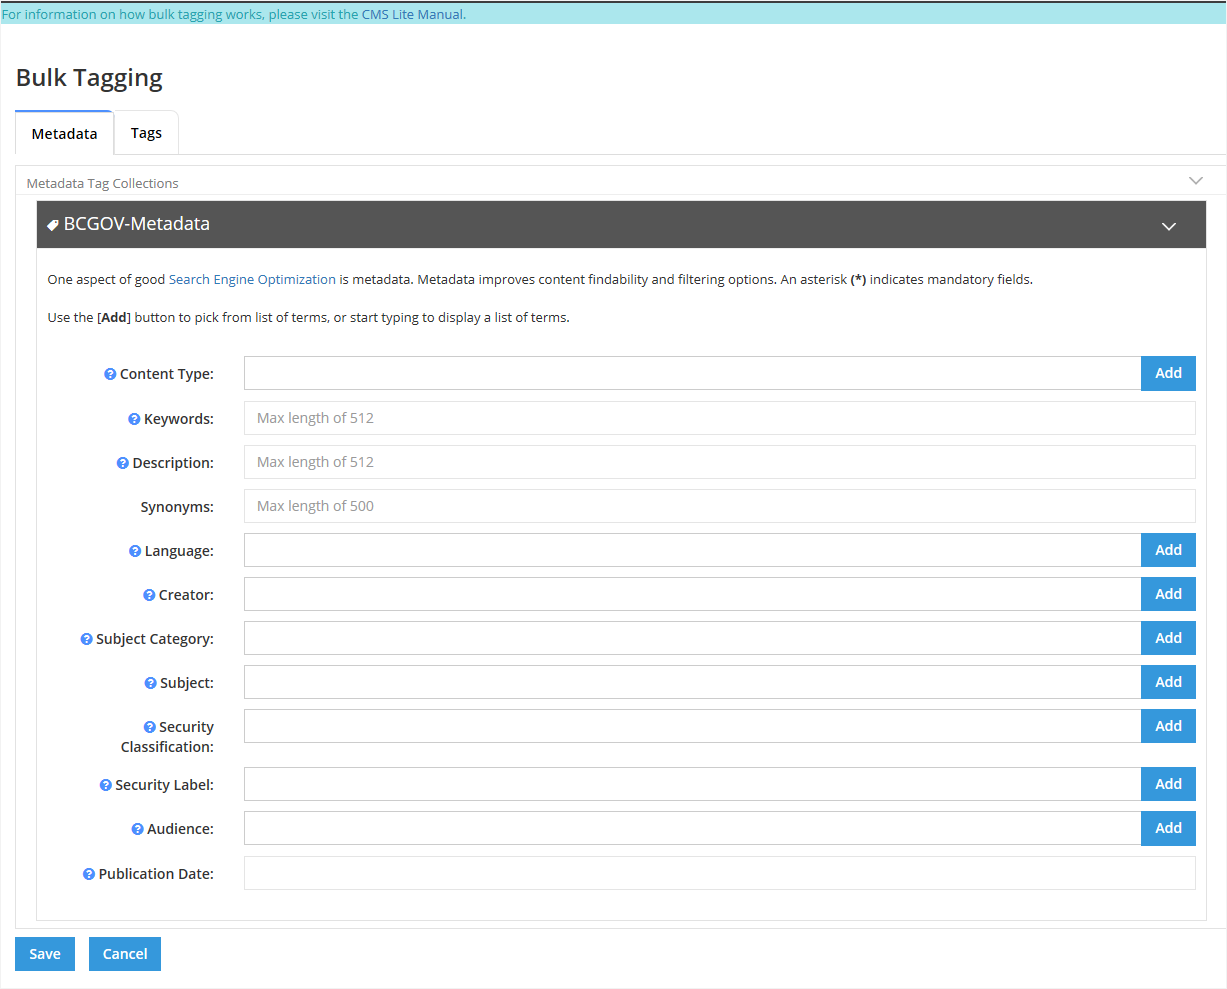
The bulk tagging screen will be displayed in the Content Pane
Click image to view in full screen
- Select the applicable tab(s) and update the terms (see Applying Terms to Fields below)
- Click [Save]
Bulk Tagging Warning Message will be displayed -
Click [Confirm] to complete the action
Confirmation Message will be displayed -
When the bulk tagging action is complete, the right-hand pane will be blank
-
Click on any title in the Navigation Pane to re-display the Content Pane. All selected pages will be updated regardless of the status of the node (e.g. locked or being modified by another user), and the Settings information will reflect the modified date and the name of the user that invoked the bulk tagging action
How to bulk tag assets
- Choose one of the following options:
- From the Navigation pane, check the box
 next to the applicable asset folder(s) and select the Bulk Tag Metadata and Terms to Selected and Their Children from the Action Menu, or
 - From the Asset Folder Pane, choose one of the following options to select the asset(s):
- Check the box
 next to the applicable asset(s), or
 - Select the box next to the File/Folder Name heading to select all assets

- Select the [Bulk Tag] action button
- Check the box
- From the Navigation pane, check the box
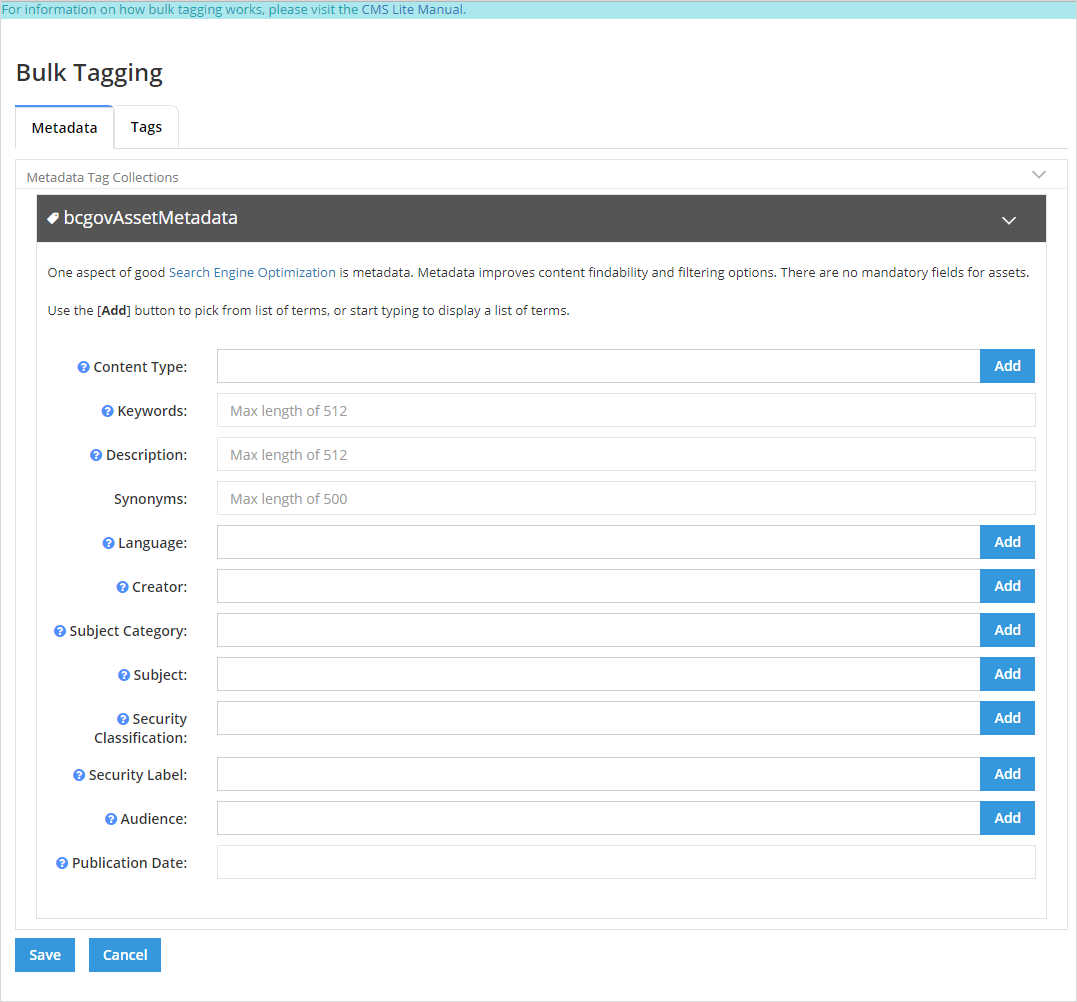
The bulk tagging screen will be displayed in the Asset Pane
Click image to view in full screen
- Repeat steps 2 - 5 under Content
- Click on any folder in the Navigation Pane to re-display the Folder Pane. All selected assets will reflect the modified date and the name of the user that invoked the bulk tagging action
Applying terms to fields
It's is important to remember when using the bulk tagging that any existing information will be overwritten if a new term is added to a field.
When a new page is created, the following metadata fields are auto-populated:
- Language = English
- Security Classification = Low
- Security Label = Public
If these fields values are applicable, leave the fields blank. Only updated fields will be modified.
- Any field left blank during the Bulk Tagging process will not be overwritten or removed.
- If an additional term is required in a populated field, both the existing term and the additional term must be included in the field.
- If the term is to be replaced, only the new term should be chosen.
View an example
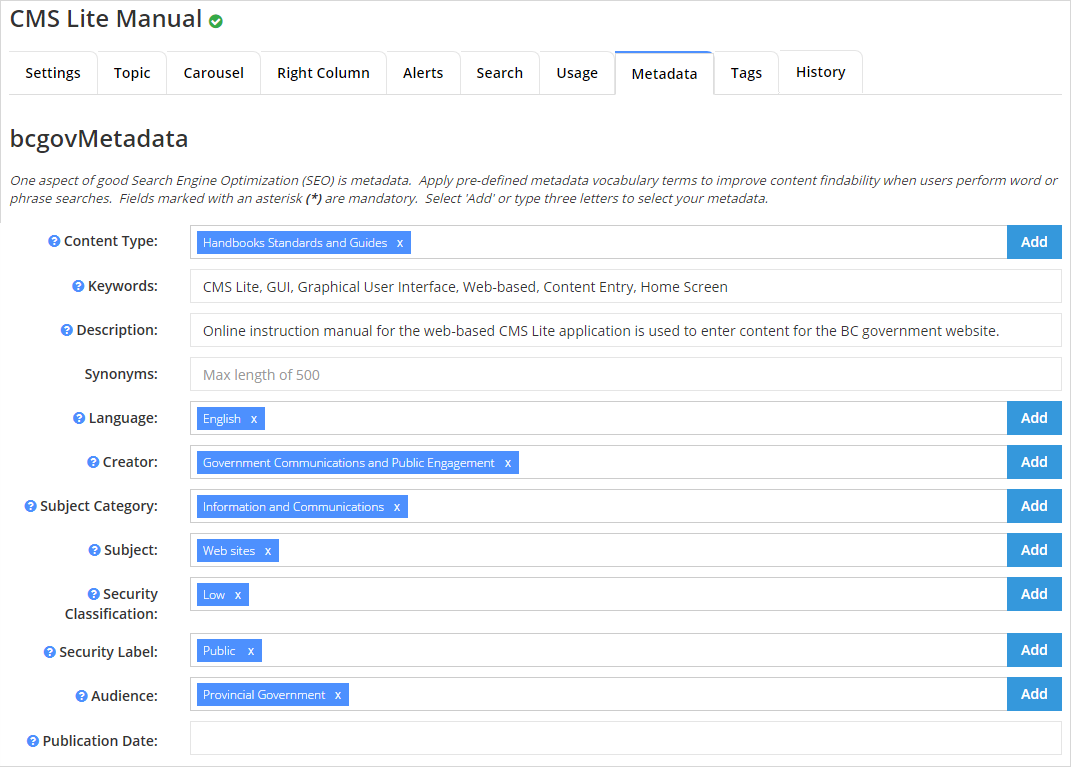
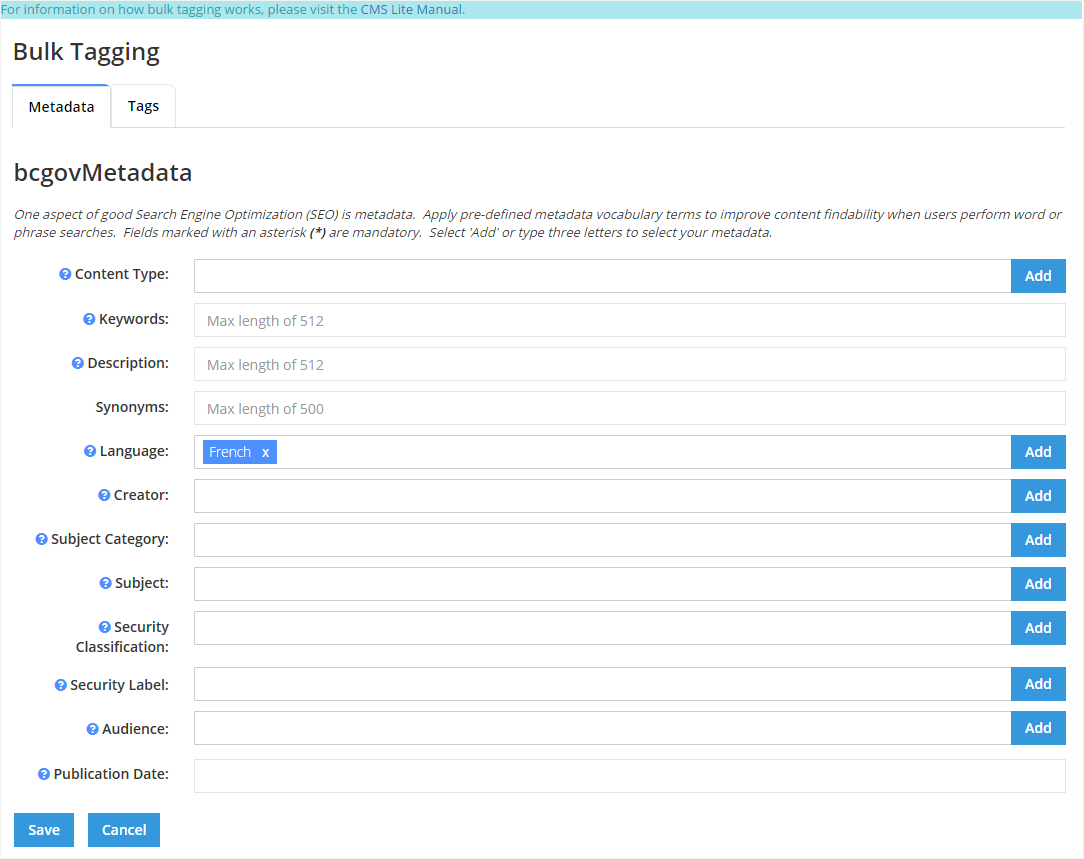
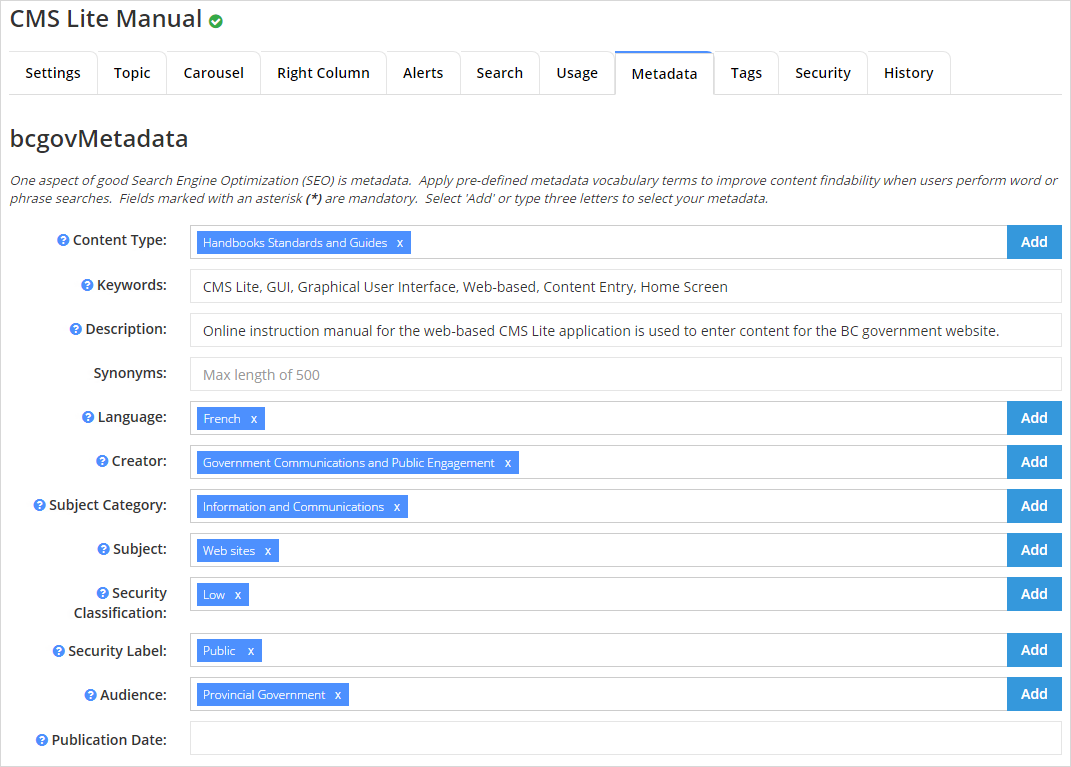
In the following example, French needs to replace English in the Language field. By selecting only the term 'French' in the Bulk Tagging pane, the current term of English will be replaced.
Existing Metadata. Click image to view in full screen.
Bulk Tagging with only the term 'French' populated in the Language field
Click image to view in full screen
Result of bulk tagging. Click image to view in full screen
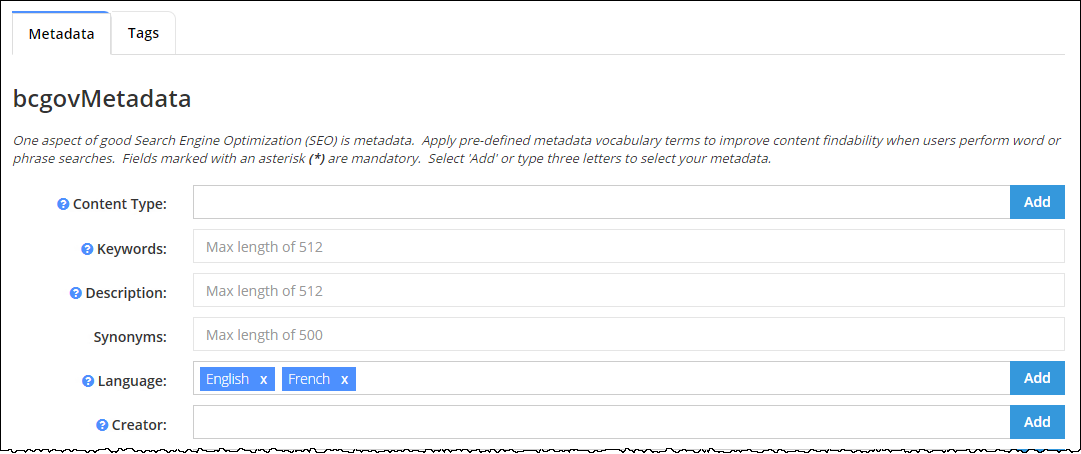
In this example, French needs to be added to the existing English term in the Language field. By selecting both English and French in the Bulk Tagging pane, the field will be populated with both terms.
Bulk Tagging with both terms populated in the Language field
Click image to view in full screen
Result of bulk tagging. Click image to view in full screen
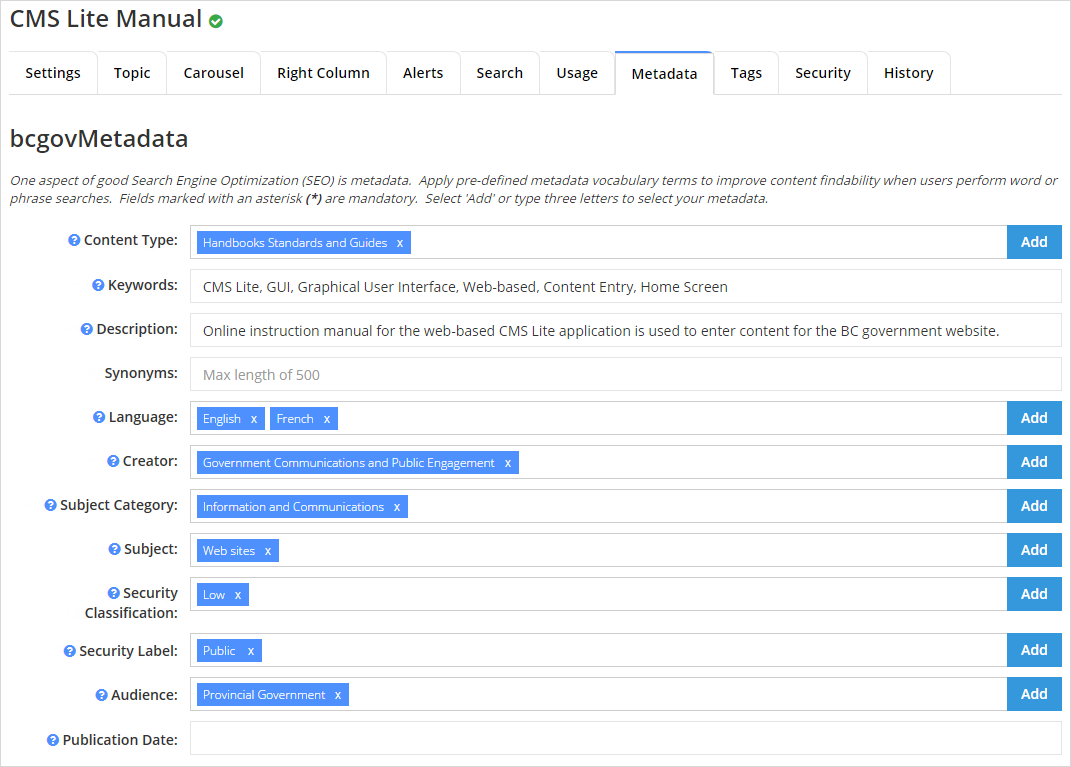
In all cases, the pages are updated regardless of the status of the node (e.g. locked or being modified by another user), and the settings information will reflect the modified date and the name of the user that invoked the bulk tagging action.

