Create a new page
Learn how to create a new page within the CMS Lite information architecture.
On this page
Understanding site structure
Prior to creating pages it is helpful to understand your site structure and the Content Navigation Pane.
Depending on the content editor and their security group, they may:
- Create all their pages under a single topic; for example, CMS Lite Manual
- Have access to numerous topics under one or more Themes and Sub-Themes
Missing topics or sections
If you do not see your topic(s) in Navigation Tree, contact the GDX Service Desk at GDX.ServiceDesk@gov.bc.ca.
New level 3 topics
All new Level 3 topics that do not already exist on the Production web server must first be approved by the IA Working Group. Once approved, the section can be added by a COS Site Administrator.
- Contact the IA Working group at GDX.ServiceDesk@gov.bc.ca
Locked pages
Pages (or nodes) are automatically locked by a content editor when a new page is created or cloned, until Published or the [Unlock] action button is used.
How to create a new page
If you are uncertain where a new or cloned page should go in the navigation, remember that sections can be moved after they have been created.
To create a new page:
Initiating new page creation
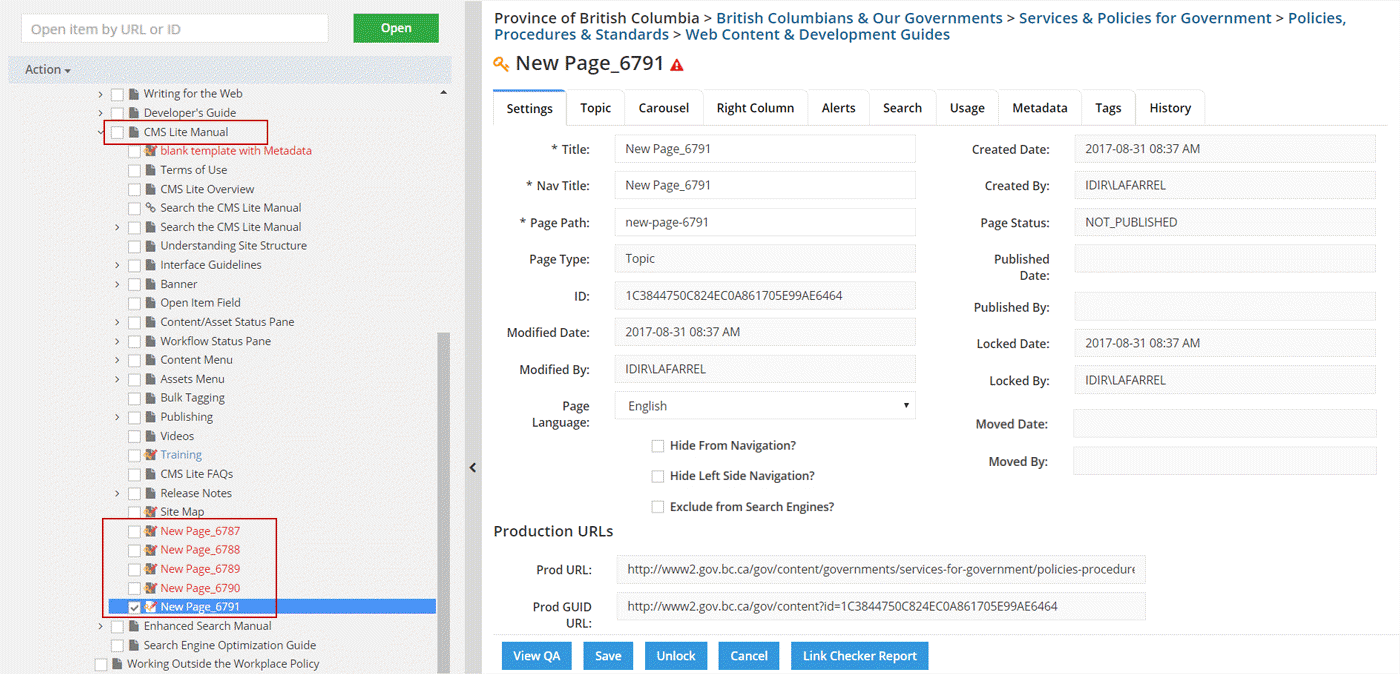
- Navigate to the applicable location in the Content Navigation Pane and select the Parent node (topic or sub-topic) that you want the new page to be created under
- Check the box next to the page node
 , or click on the page node title to select it
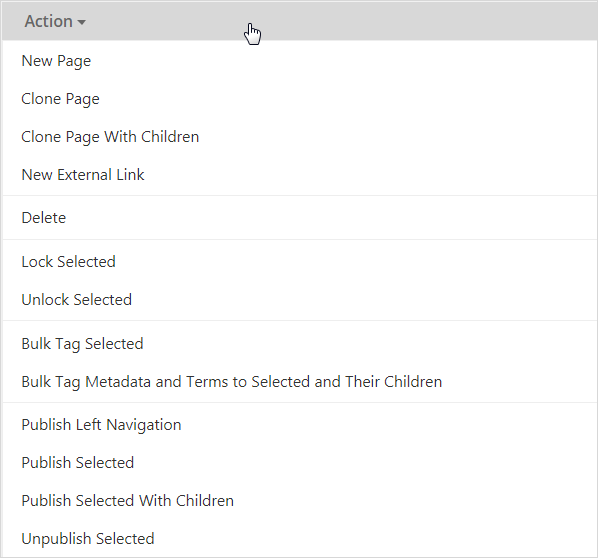
- Click the drop-down Action menu and select New Page
Setting up your new page
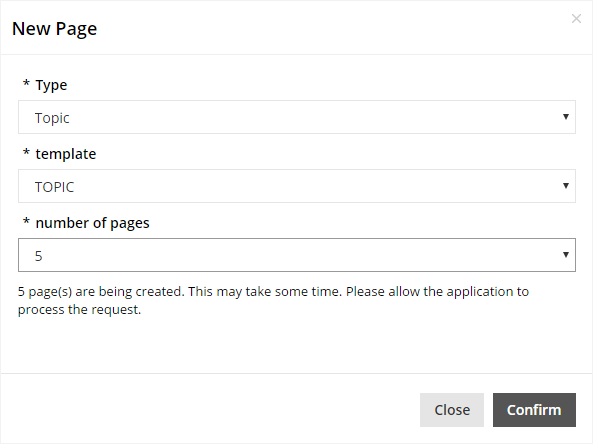
The Choose a Template box will be displayed with Topic as the default
- Select the page type, the template, and the number of pages
- Most content is created using the Topic template. If you are uncertain, confirm with your internal web group
- Number of pages defaults to one (1). Choose from the drop-down list to create more than one page. If more than one page is selected, a message will be displayed below the number of pages field.
- Click [Confirm] to complete the action
A confirmation message indicating the number of pages created will be displayed, along with a validation warning
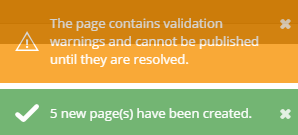
The New Page(s) will be displayed in the Content Pane and will appear n the navigation tree at a child level (one level down) of the selected page
Final steps and publishing
- Edit and update all mandatory fields for the new page. Use the 'Save' and 'Publish' buttons as needed, ensuring all validations are met
- Remember, new pages are initially locked and can be moved in the navigation tree
Mandatory and auto-populated fields
Mandatory fields
All three of the following fields must be updated before publishing.
They will be auto-populated with New-Page-x, where x is a unique system generated number:
- Title
- Nav Title
- Page Path
Auto-populated fields
Prod URL and Prod GUID URL are automatically assigned to the new page(s).
The following fields are pre-populated with applicable information:
Under the Settings tab:
- Created Date
- Created By
- Modified Date
- Modified By
- Locked Date
- Locked By
Under the Metadata tab:
- Content Type
- Language
- Security Level
- Classification terms
All other mandatory fields must be completed before a new page can be published.
- See the Content Pane tab for further information
Validation warnings
CMS Lite will display the following error messages if the page can not be published.
New page warning
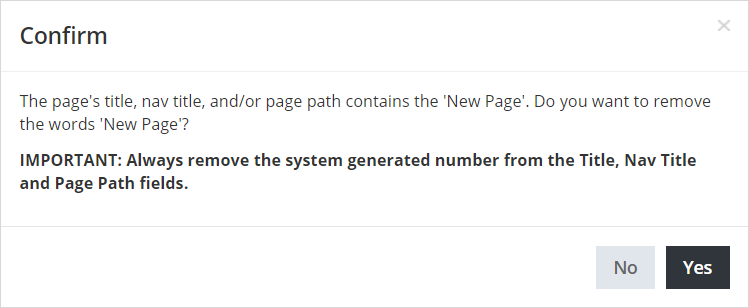
You will see a warning message the first time you select the [Save] action button if you do not remove the words 'New Page' from the settings tab:
- Title
- Nav Title
- Page Path
Make sure to also remove the system generated number from all three fields.
The message will not be displayed on subsequent saves.
Yellow and red validation warning messages
Until all mandatory fields are completed:
Yellow warning
A warning message will be displayed each time the [Save] action is invoked:
- An exclamation mark will be displayed on the tab(s) that contain missing field information
- The field(s) will be highlighted by a yellow border

Red warning
If the [Publish] action is selected when missing mandatory fields exist:
- The warning message and icon(s) will be red
- The field(s) will be highlighted by a red border

Maximum page levels
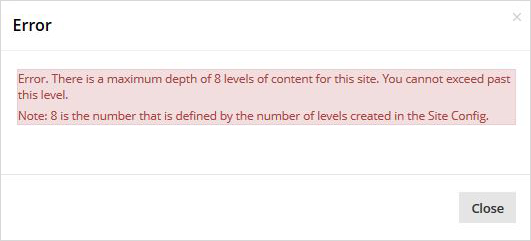
If you attempt to create content below level 8 an error message will be displayed.
Site structure allows for content to be created to a maximum of level eight.
