Replace existing assets
Learn how to overwrite an existing asset to replace it with a new version in CMS Lite.
Introduction to asset replacement
Existing assets can be replaced with new versions by uploading a replacement file.
To replace an asset in the production environment, you must upload and publish the replacement asset.
Restrictions on asset types
The following asset types cannot be uploaded into the CMS Lite: shtml, html, htm, js, css, php, jsp, json. If an upload contains any of these file types, an error message will be displayed and none of the invalid files will be uploaded.
Duplicate file names across folders
If a file with the same name is uploaded into two different asset folders, each will be assigned a unique ID (GUID). This is designed to ensure that other files with the same name (i.e. org-chart) are not accidentally overwritten.
If the intention is to overwrite an existing file, upload it into the same folder.
- If you don't know where a file exists, use the Asset filters to search for the location.
Asset file names
File name restrictions
System validation will replace all spaces with underscores and all capitals with lowercase characters. As long as the replacement file has the same name (even if capitals and spaces appear), the overwrite message will be displayed.
If you intend to overwrite a file and you do not get the overwrite message, click Close to cancel the upload.
Naming new versions of existing files
When replacing assets in CMS Lite with a new version, it is often helpful to use the same file name for the updated version. This approach not only aids users who have bookmarked the asset but also minimizes the chances of a search engine encountering outdated content. To track changes or versions of the document, include the version number within the document itself rather than in the file name.
Always use your best judgement based on the type and content of the file, and make sure you follow the information retention schedule.
You may also upload a single asset to the Asset Settings Pane.
Steps to replace an existing asset
To replace an existing asset:
- Navigate to the applicable location in the Asset Navigation where the existing asset resides
- Click on the Asset Folder title
 to select it
- Click the drop-down Action menu and select Upload File(s)
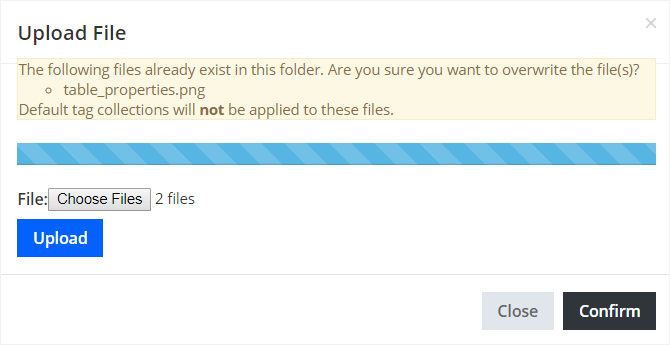
The Upload File box will be displayed

- Click the [Choose Files] button
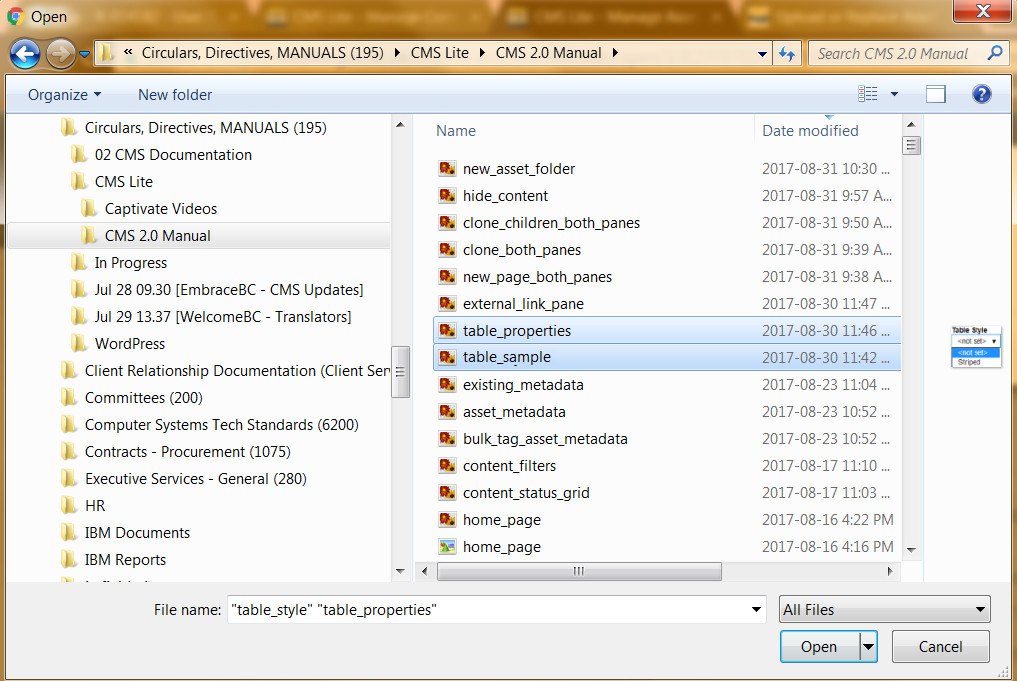
The Choose file box will be displayed

- Navigate to the applicable file(s)
- Select a single file, or hold the Shift or Ctrl key down to select multiple files
- Click [Open]
The Upload File box will display with the number of selected files, indicating which file(s) will be overwritten

- Click the [Confirm] button to complete the action. Chose [Close] if you do not wish to overwrite the files
A progress bar will be displayed in the Upload File box

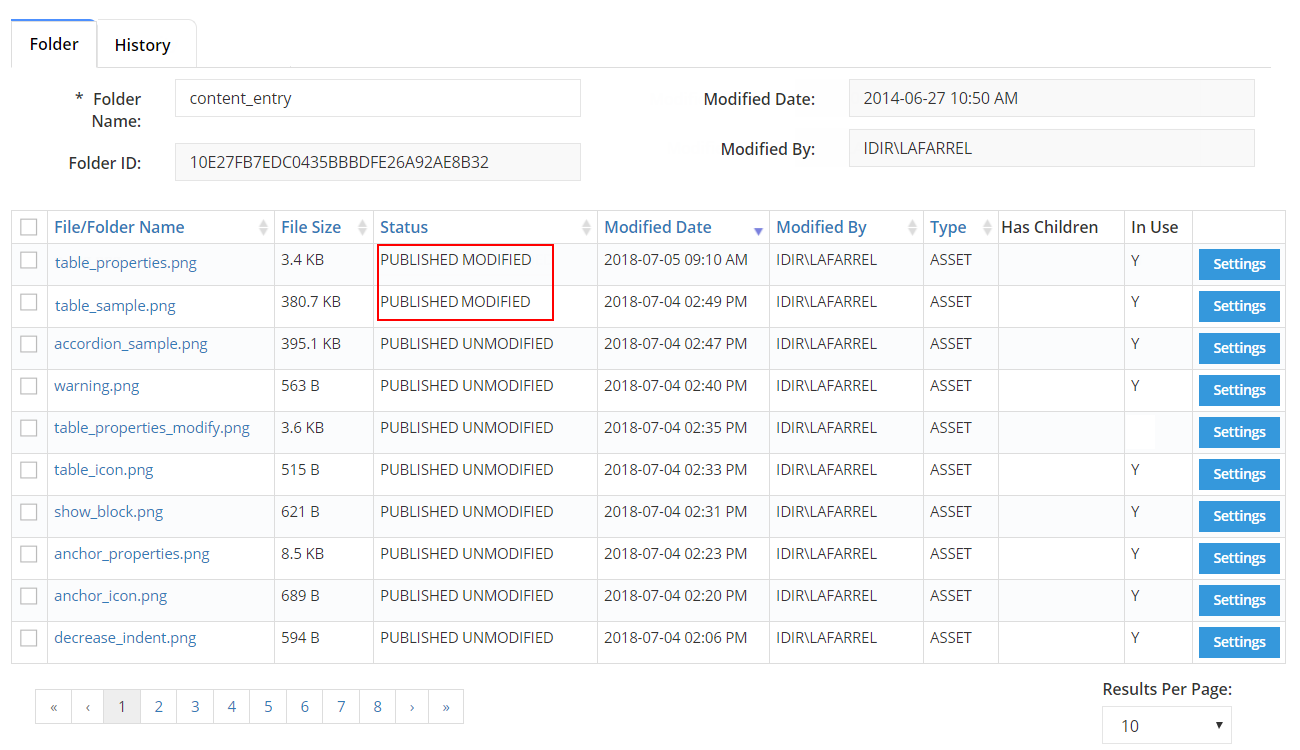
- Once the upload is complete, select the Folder tab in the Asset Folder Pane
The asset(s) will be in a PUBLISHED, but Modified Y status
Click image to view in full screen
- Select the checkbox
 next to the modified file, and choose the [Publish] action button to re-publish the modified file to the Production web server.

