Lesson 5 - Introduction to Field Indicators - Part 1
Objective
This lesson covers the basics of point indicators which are collected during the field assessments. The protocol and field guide are an important resource. You should never go to the field without having these with you (uploaded to your iPad or a hard copy).
Field Sampling Data Collection - Point Indicators
In this lesson you will understand:
- Where to collect point data;
- Which attributes are measured at the point stations;
- How to measure the different point attributes and;
- Where to record the information you collect, and how to use it to answer the evaluation questions.
NOTE: This training course provides an overview of key indicators. It is not a replacement for the protocol, field guide and field training. This section attempts to clarify some of the indicators that FREPers can struggle with when doing the assessments on their own.
Field Data
Review Pages 2-6 of the checklist. The pages are designed in such a way that the information is linked to the Functioning Condition question. This enables the assessor to know why the data is being collected and where this data will be referenced.
There are three types of data/observations. (This lesson covers the first):
- •Point Indicators
- •Continuous Indicators
- •Other Indicators to Note
Field Sampling Information: Point Indicators
Point Indicators - Overview
There are essentially 7 types of point indicators you will be looking for at each transect station along the reach for any stream being assessed. Refer to page 2 of the checklist.
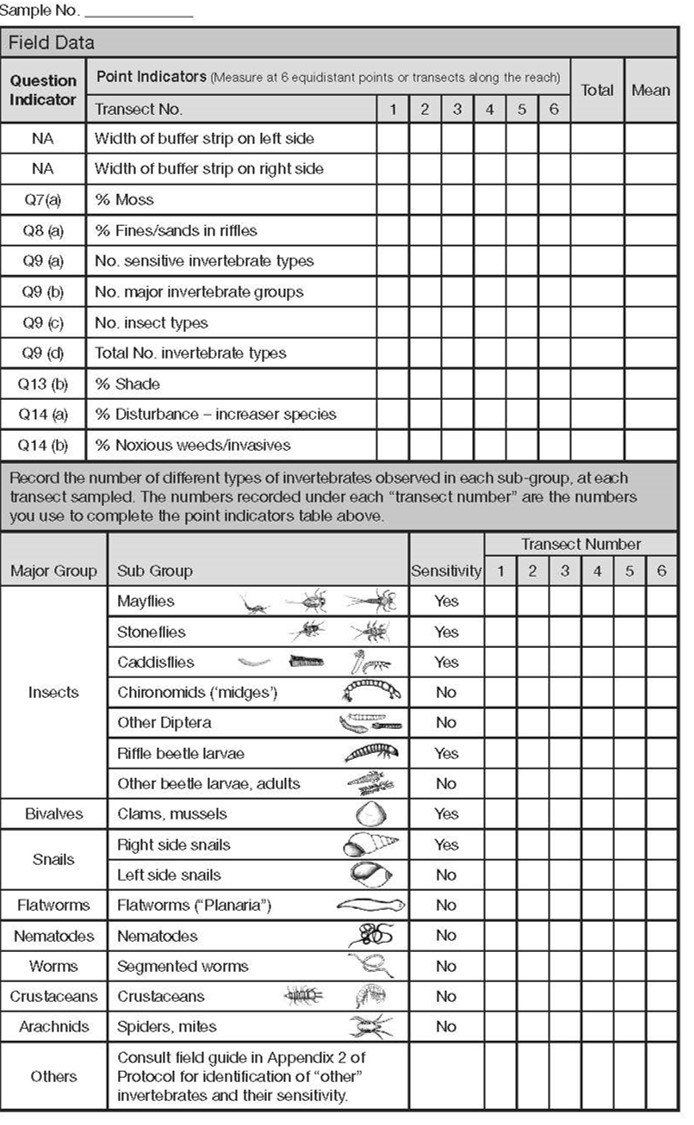
The assessor(s) use 6 transects, as needed, to collect the following information at the riffle nearest to the location of the transect:
- buffer width (left and right side),
- % moss on the channel bed,
- % fines/sands covering the channel bed, benthic invertebrate sampling results,
- % shade,
- % disturbance increaser plants and
- % noxious weeds/invasive plants in the 10m riparian area beside the stream.
Collecting Point Indicators in the Field
Click on this link to view a video on collecting point indicators
NOTE: buffer width (left and right side) can be estimated or measured using pacing, hip-chain or digital rangefinder.
-
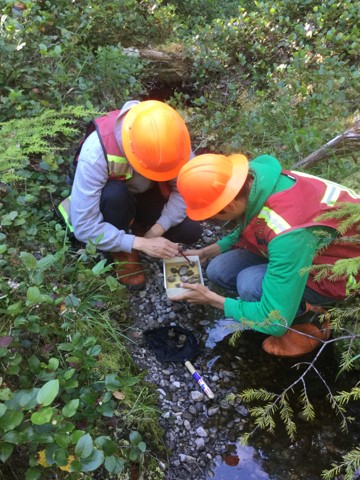
Benthic invertebrate sampling results may take some time, especially if you collected a lot of material in your net. It may take several subsamples of the contents of the net to conclude your sample. Consider using a medicine syringe to transfer specimens to a spare white tray - this is a helpful way to keep track of the DIFFERENT TYPES of each Sub-Group.
-
% fines/sands covering the channel bed was measured by touch along the 2.5m carpenter tape. On average, our dexterity measure of a finger tip is 1cm, so simply ‘feeling’ your way along the carpenter tape and tallying how many 1cm sections felt like fine sediment on the surface of the channel; do NOT dig down!
-
% moss on the channel bed. The width of the stream in the video was 2.5m in width; a collection of moss equaling a 25cm x 25cm area would be tallied as 1% of this subplot of the stream’s channel.
-
% shade is estimated for 3 cardinal directions, taking the HIGHEST 2 of these 3 estimates to record an average. If the stream is wide, repeat the process from the left bank and right bank and then take the average.
-
% disturbance increaser plants and % noxious weeds/invasive plants in the 10m riparian area beside the stream is estimated as a foliar intercept measure along the 10m logger’s tape. Averaged using the estimates from both sides of the stream. If you observe noxious/invasive plants, be sure to record them on page 18 for reference and subsequent reporting using the FREP Invasive Species field card (or use Report a Weed).
For each indicator, record the observation according to which transect was being measured. Note that the indicator is referenced to the relevant functioning condition question. For example, % moss is collected to answer question 7a.
The point indicator data is subsequently summarized by calculating the averages for each indicator. Sometimes, the indicators are consistent and to save time the assessor may only record 2 to 3 observations (e.g., buffer widths or benthic samples). If the indicator is not applicable (e.g., the stream is DRY or FLOODED and you cannot sample benthic invertebrates) or not measured (e.g., you cannot safely get to one of the transects), then the assessor will record a “-“ corresponding to that indicator and for that transect. If an indicator is not observed, then record a zero for that transect (e.g., if there are boulders, but they have no moss, record moss as being zero % for that transect).
Point Indicator: Moss
Point Indicator: Moss (Indicator Q7a)
Moss is only considered if it is growing on inorganic substrate (e.g., bedrock, boulders and cobbles).
% moss on the channel bed and in the riffles nearest the transect station.
Moss is only counted if it is below bankfull depth (high water mark)
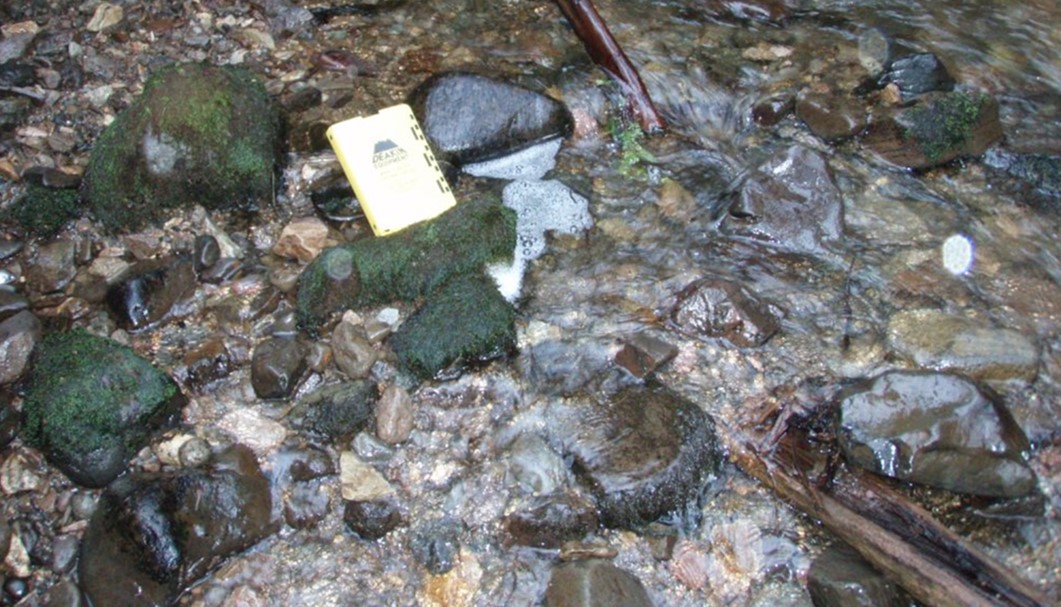
The width of the stream in the video was 2.5m in width; each collection of moss equaling a 25cm x 25cm area would be tallied as 1% for this subplot of the stream’s channel.
Point indicator: % Fine Sediments
Point Indicator: % Fine Sediments in Riffles (Indicator Q8A)
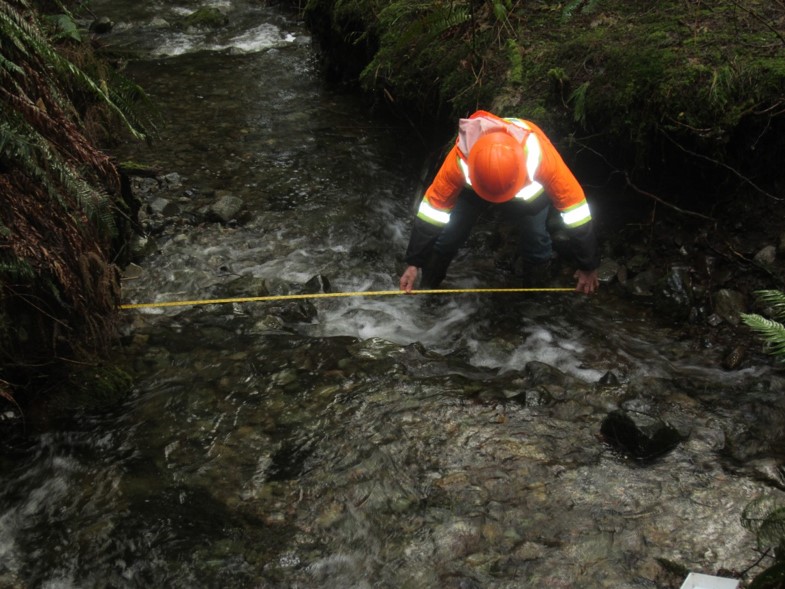
% fines/sands covering the channel bed was measured by touch along the 2.5m carpenter tape. On average, our dexterity measure of a finger tip is 1cm, so simply ‘feeling’ your way along the carpenter tape and tallying how many 1cm sections felt like fine sediment on the surface of the channel; do NOT dig down!
Consider using a clear plastic water bottle as a periscope to look down into the stream as an alternative. This works very well when the water is moving fast and/or is murky.
Point Indicator: Benthic Invertebrate Sampling
Point Indicator: Benthic Invertebrate Sampling (Indicators Q9a-d)
We use a standardized drift net and take the samples within the riffles, but along the margins. We sample by hand stirring the substrates immediately upstream of the net, for about 2 net widths of area; being sure to stir up the bed materials and hand sweeping the edges of boulders and larger cobbles. We do not sample under high flood conditions and not if within 2 weeks of a dry creek being recharged with water from heavy rains.
Benthic invertebrate sampling results may take some time, especially if you collected a lot of material in your net. It may take several subsamples of the contents of the net to conclude your sample. Consider using a medicine syringe to transfer specimens to a spare white tray - this is a helpful way to keep track of the DIFFERENT TYPES of each Sub-Group.
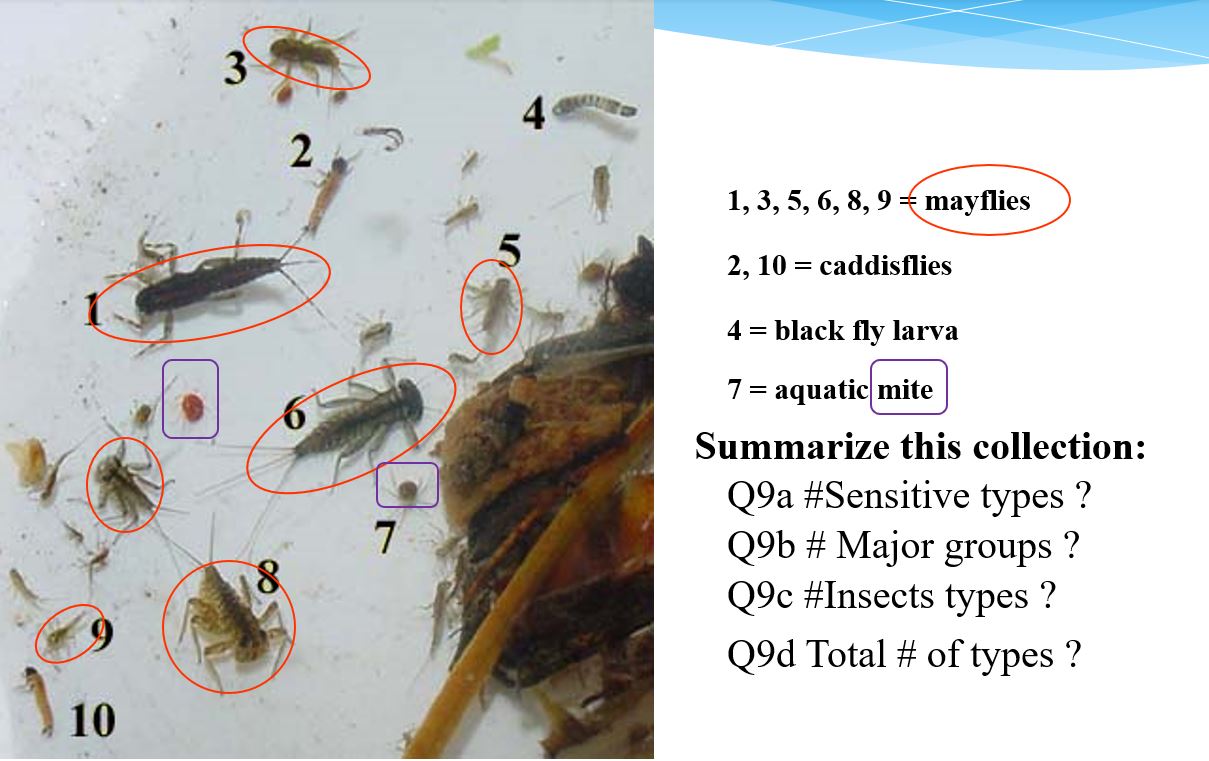
We are looking at the ‘diversity’ and not full counts. At a sampled transect, we simply tally the different looking ‘critters’ according to the subgroup they resemble. Once all the DIFFERENT looking types of ‘critters’ have been tallied, we then summarize the tally to the associated Q9 indicator at the top of page 2.
For example, if you have 5 planaria in your sample tray and they are all brown in colour, then we record 1 type of planaria (flat worm). Conversely, if you found 5 planaria in your sample tray, two were gray and three were brown, this would be recorded as 2 types of planaria because they are different in colour.
You will notice the tally card was designed to help in the subsequent summary.
- The left column shows the major GROUPS (used for Q9b)
- Sub-Groups are depicted with sketches to help you with identification
- If a type of benthic invertebrate has sensitivity to pollution and sedimentation, note the YES beside the associated ‘critters’
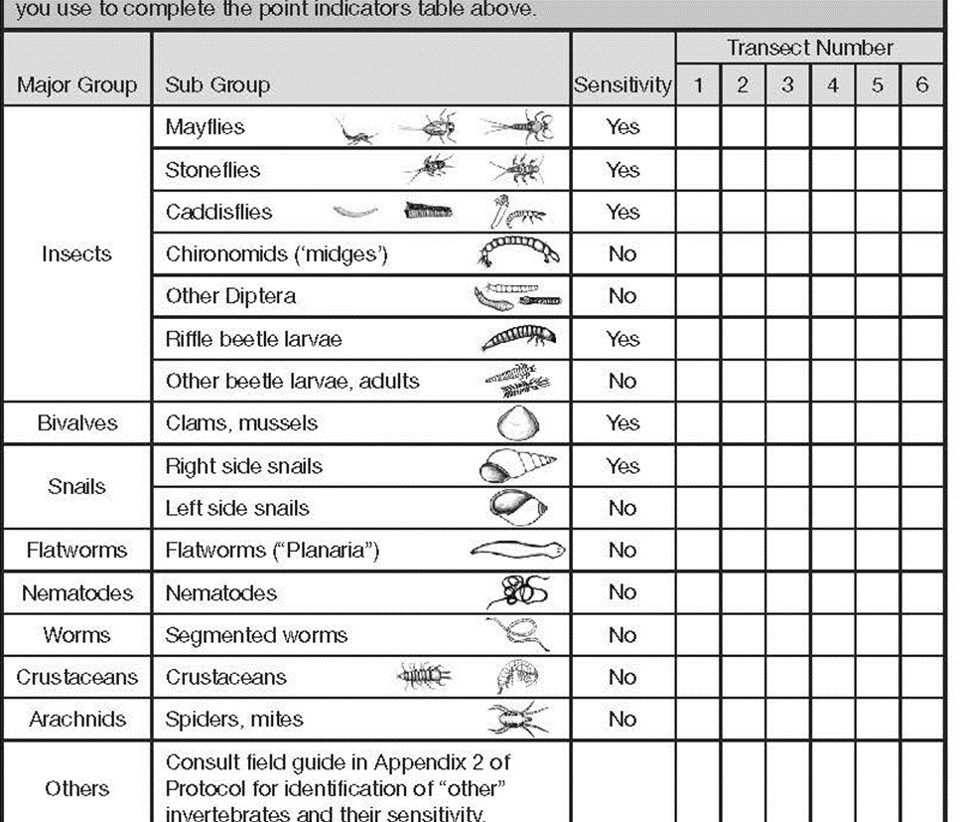
Using the Planaria example of 2 gray and 3 brown ‘types’ of planaria, refer to the top of checklist page 2. You would record the following:
- Q9a # of sensitive invertebrates: 0 (planaria are not sensitive)
- Q9b # of major groups: 1 (we only have flatworms represented)
- Q9C # insect types: 0 (planaria are not an insect)
- Q9d Total # of invertebrate types: 2 (gray and brown planaria)
Benthic Invertebrate Self-Check Questions
Point Indicator: Shade Cover
Point Indicator: % Shade cover (Indicator Q13b)
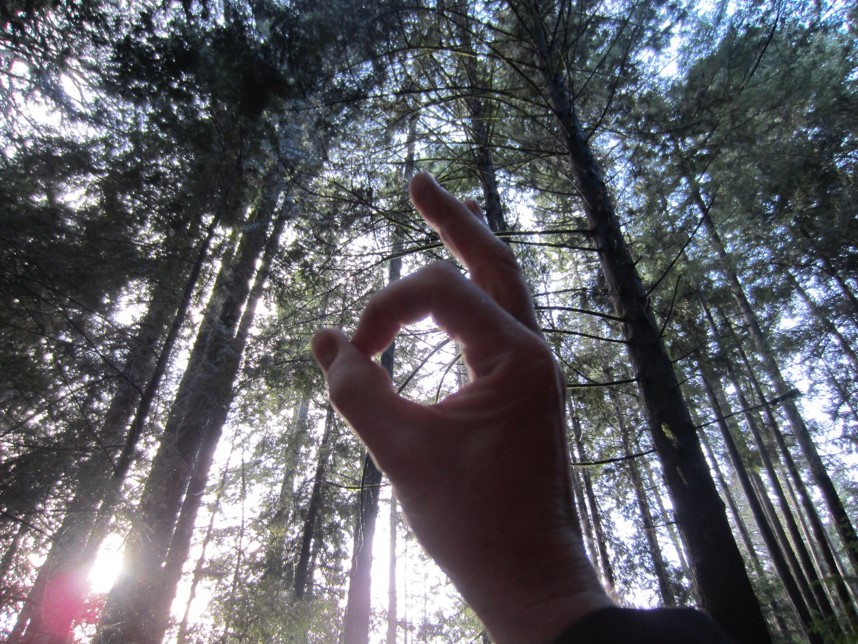
The measure of shade to the stream is simply estimated using your thumb and forefinger to make a circle. Look South, East and West with your arm held at 60°, looking through your ‘circle’, estimate how little SKY (shade) you see as a % of the whole circle. Of these 3 measures, average the highest TWO. For streams wider than what you can straddle with a foot one each bank, you estimate average shade on left and right banks, then take the average of these.
Point indicators: % Disturbance Increasers & % Noxious Weeds
Point Indicators: Disturbance Increasers and Invasive/Noxious Weeds (Indicators Q14a and 14B)
% disturbance increaser plants and % noxious weeds/invasive plants in the 10m riparian area beside the stream is estimated as a foliar intercept measure along the 10m logger’s tape. Averaged using the estimates from both sides of the stream.
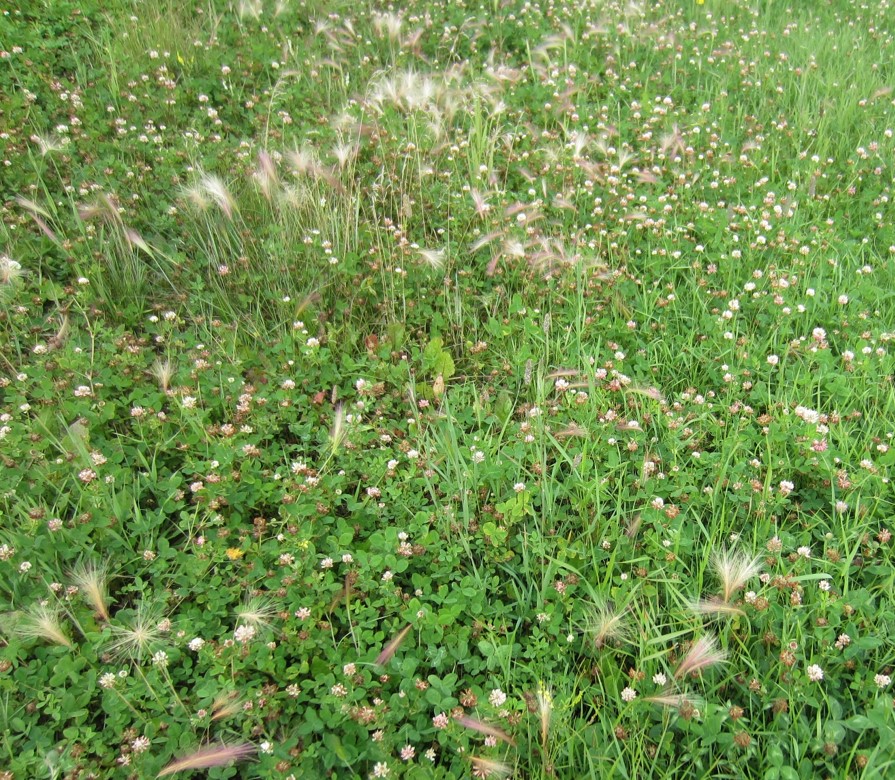
Example in photo above: Foxtail barley, Clovers & Bluegrass are Disturbance Increasers
Disturbance Increasers (Indicator Q14a)
Review the listing of disturbance increasers in the protocol or field supplement. Remember, these are plants which are able to persist and spread amidst ground disturbance. These are NOT pioneer species (e.g., fireweed) that establish after disturbance.
Noxious Weeds/Invasive Plants (indicators Q14b)
Review the listing of noxious weeds and invasive plants listed in the protocol or field supplement. Your district may have a “hot” list of priority species – be sure you have this list. A plant ID guide is a valuable addition to your field kit. If you observe noxious/invasive plants (whether along the transect or elsewhere), be sure to record them on page 18 for reference and subsequent reporting using the FREP Invasive Species field card (or use Report a Weed).

