Limiting form availability
You can make a form available during a specific time window for things like application or nomination periods.
On this page:
Overview
A time widow can be set to make a form available between certain dates and times. This can be useful for time-limited activities like application or nomination periods. Citizens accessing the form early or late will be presented with a message instead of the form and there will be no buttons displayed.
Setting a time window can have several benefits:
- You can link to the form in marketing and communications ahead of time and prevent a "Page not found" error if someone clicks the link early
- You can ensure that submissions can't be made after the deadline, even if the form is still loaded in their browser
- You don't have to sychronize the publication of form and content pages
- You don't have to manually unpublish the form page at the deadline, which doesn't prevent submissions of forms loaded in browsers
- You don't have to unpublish the form at all and can update the "closed" message to point people to related information
Depending on the situation, you may need to plan some post-release activities.
For additional information, see:
Setting a time window
Get clarity on active dates
Some clients might use less-specific terms like "midnight" or express dates as "from the 10th to the 25th". There can be more than one way to interpret terms like these. Ask clients to confirm which days they want to be receiving submissions on to prevent misunderstanding.
Give users (and yourself) a second
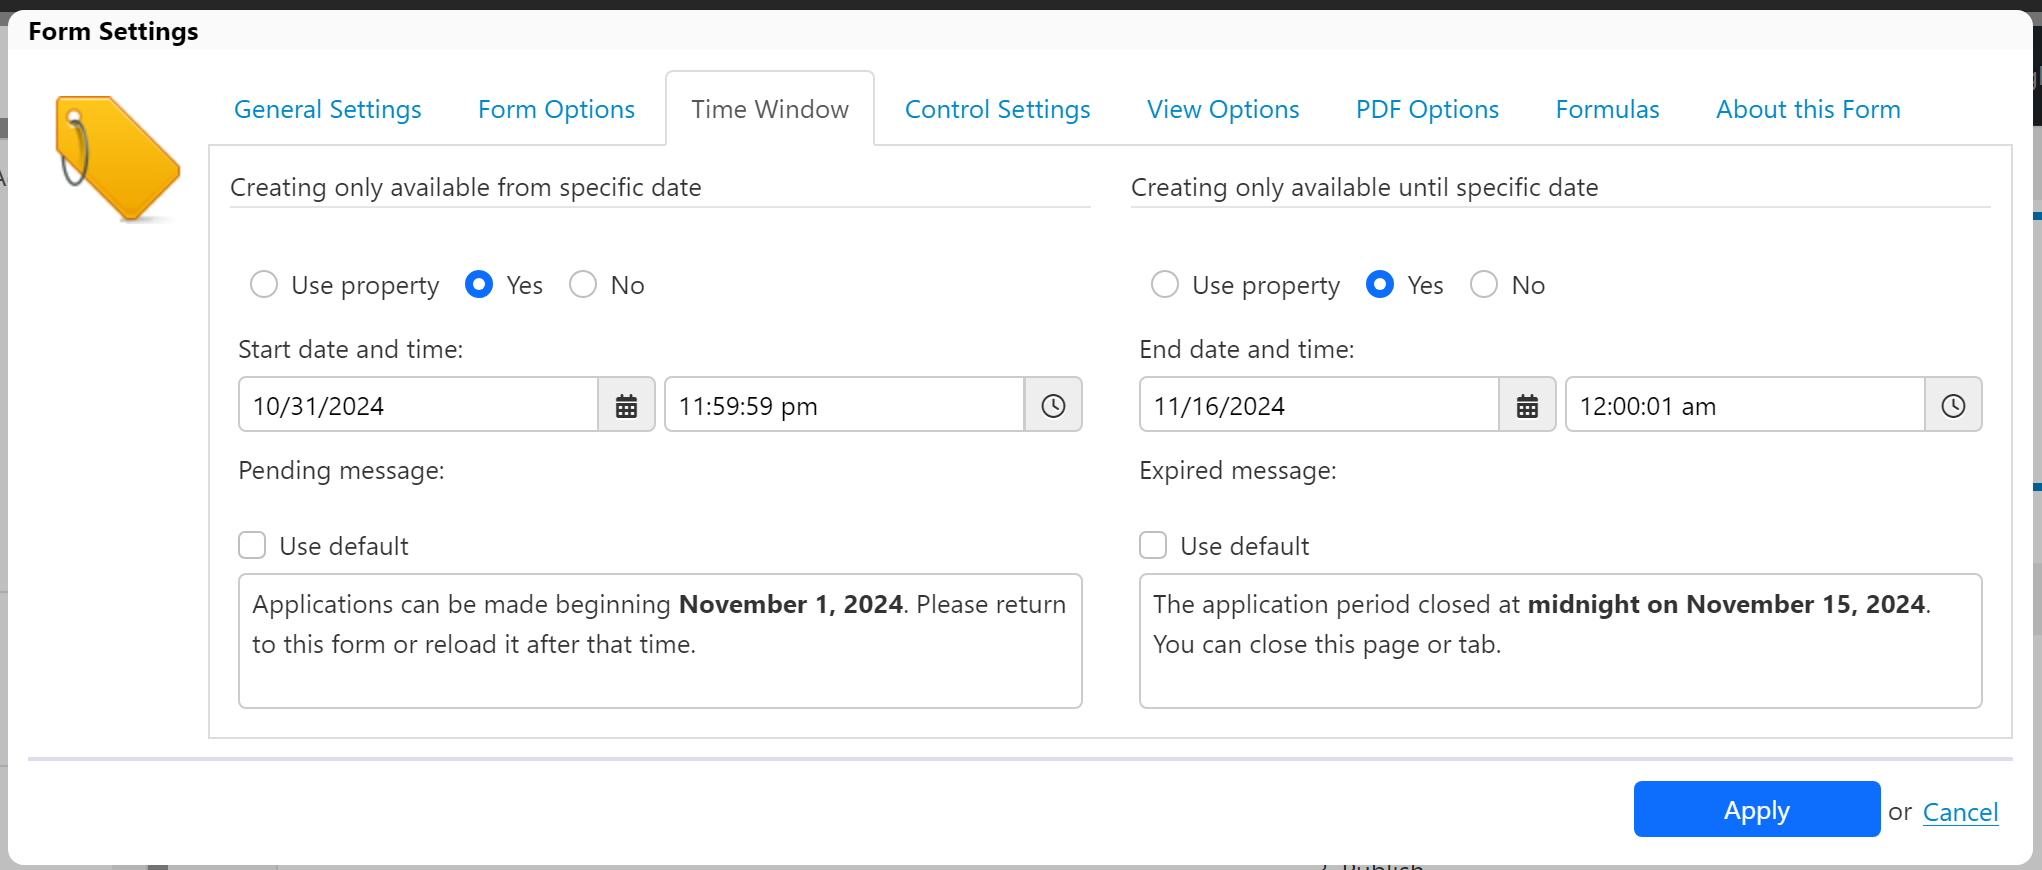
It can be difficult to remember if 12:00:00 AM is the end of one day or the start of the next one. If your client wants to use midnight as the transition time, avoid the possibility of accidentally starting or ending a day early or late by setting times one second before and after.
- Start at 11:59:59 PM on the day before the designated start day.
- End at 12:00:01 AM on the day after the designated end day.
Set up the window using the Time Window tab of the Form Settings.
To access the Form Settings dialogue window:
- Click on the "gears" icon in the editor bar above the toolbox
- Click "Form settings" in the Advanced toolbox
Click on the Time Window tab to view it and change settings.
To set a start or end time and message (either or both):
- In the "Creating only available [from/until] specific date" field, click the "Yes" button
- Set the start/end date and time
- (Recommended) Uncheck the "Use default" checkbox for the pending/expired message
- (Recommended) Enter the text in the text box
- Click the Apply button
Custom, specific messages are recommended. The default messages are:
- This form is not yet available
- This form is no longer available

Suggestions for testing or validating a time window
Time windows take effect as soon as you set them. This can make testing and confirming them a little challenging, especially when doing client testing.
Consider using this workflow:
- Build your form normally
- Don't set the time window
- Get client approval on the form itself
- When the form is approved
- Open the form for editing
- Open a new email message
- Set the time window
- Take a screenshot
- Add the screenshot to the email
- Send the email to the client asking for approval
- Save your form
- When the window is approved
- Open the form for editing
- Publish the form
- Plan or schedule release as normal
If one or both of your messages includes a hyperlink, consider copying the text of the message and pasting it into the email so that the client can confirm that the link works correctly.
