Step 8 - Complete the Opportunity and Project
Step 8 - Complete the opportunity and project
Completing an Opportunity
Click to enlarge image
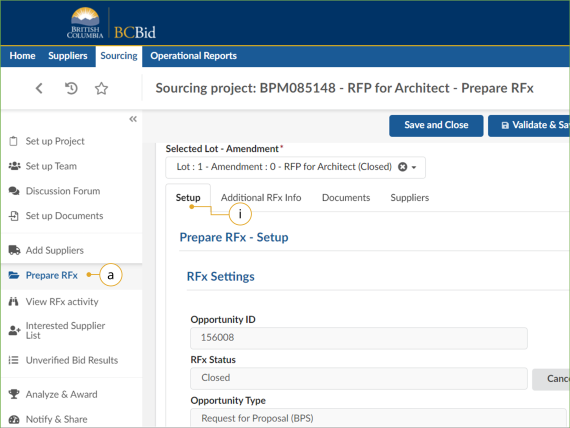
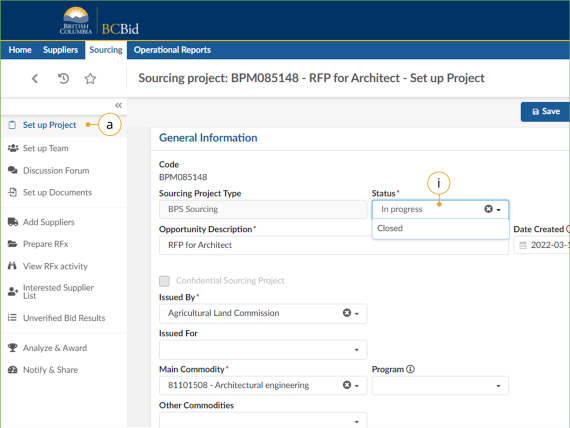
48. When appropriate, change the status of the opportunity to ‘Completed’:
a. In the left-hand menu, click Prepare RFx.
i. Click the Setup tab.
![]()
This step does not apply to opportunities with continuous intake until the Closing Date is reached.
Click to enlarge image
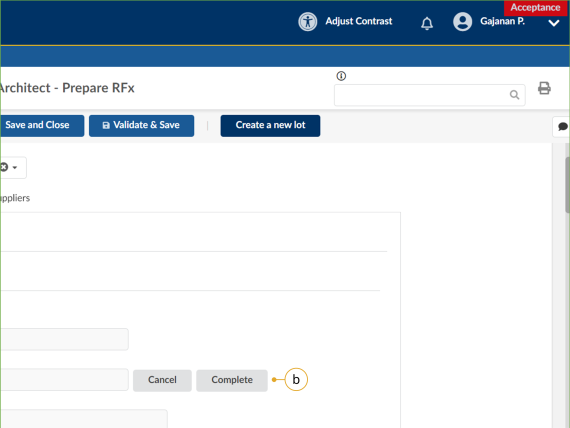
b. Click Complete to change the RFx Status from ‘Closed’ to ‘Completed’.
Note: Click Cancel to cancel the opportunity at any point before the contract award notice is published. There can be different reasons for cancelling an opportunity.
![]() Suppliers who participated in the opportunity will see the opportunity in ‘Processing’ status until the RFx status is changed to ‘Completed’ by clicking the Complete button.
Suppliers who participated in the opportunity will see the opportunity in ‘Processing’ status until the RFx status is changed to ‘Completed’ by clicking the Complete button.
Creating a New Lot
Lots are utilized in multi-stage procurements, they connect different stages of a procurement (eg: RFI, RFQ and RFP). The Discussion Forum, Set up Team, Set up Documents, and Enquiries as well as the Add Supplier tabs are copied across all RFx/Lots within a Sourcing Project.
Click to enlarge image
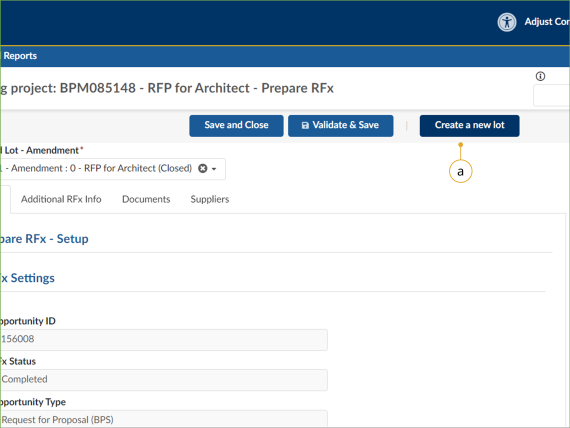
49. Optional: To create a new Lot, in the left-hand menu, click Prepare RFx.
a. Click Create a new Lot.
Note: The information entered in Discussion Forum, Set up Team, Set up Documents and the Add Supplier menus is copied across all opportunities within a Sourcing Project.
Click to enlarge image
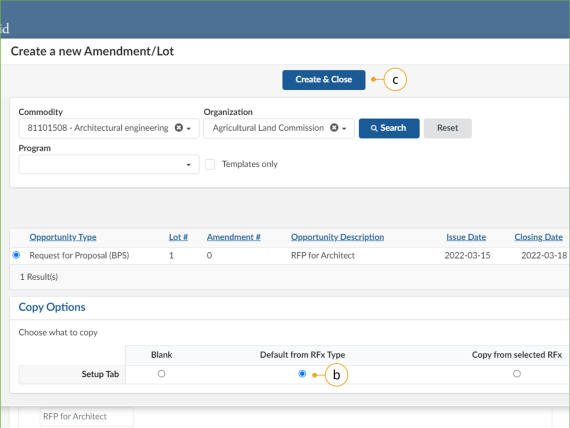
b. In the dialog box, within the Copy Options table, ensure the Default from RFx Type option is selected.
c. Click Create & Close and then click Continue.
Note: When you are editing or reviewing an opportunity, ensure that you are in the correct Lot.
Click to enlarge image
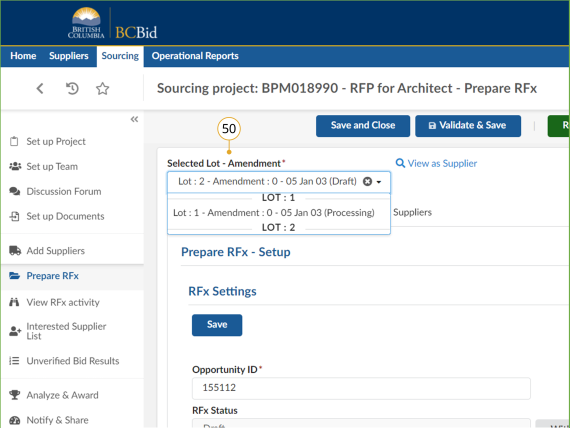
50. Optional: To toggle between Amendments or Lots, in Prepare RFx menu, choose the Amendment or Lot using the Selected Lot – Amendment dropdown.
Close the Project
Click to enlarge image
Buyers must use the Contract Award Notice for all direct awards that are over threshold. The Contract Award Notice is used for any purchases from a standing arrangement, standing offer or other form of direct selection. Additionally, the Contract Award Notice is used for opportunities that result in multiple contract awards.
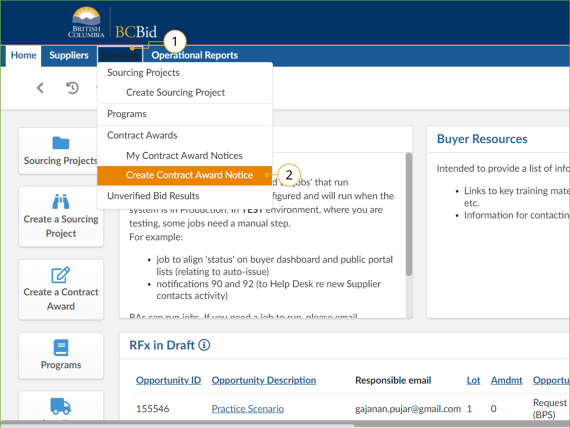
1. On the main menu, click Sourcing.
2. Click Create Contract Award Notice.
Note: The My Contract Award Notices menu is intended to allow Buyers to review and edit the contract award notices that they have created through the Create Contract Award Notice form. It does not show (or allow Buyers to edit) Contract award notices that were created through the Notify & Share menu in an opportunity.
Click to enlarge image
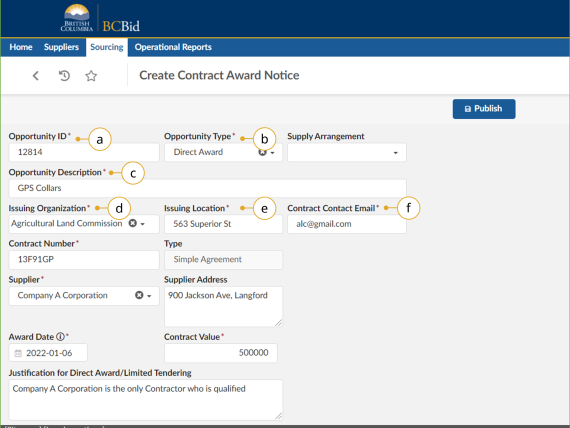
3. In the dialog box:
a. Enter the Opportunity ID.
b. Select the Opportunity Type.
c. Enter the Opportunity Description.
d. Select the Issuing Organization.
e. Enter the Issuing Location.
f. Enter the Contract Contact Email.
Note: The Supply Arrangement drop-down list is not applicable to Direct Awards but is required for multiple contract awards resulting from a single opportunity.
Click to enlarge image
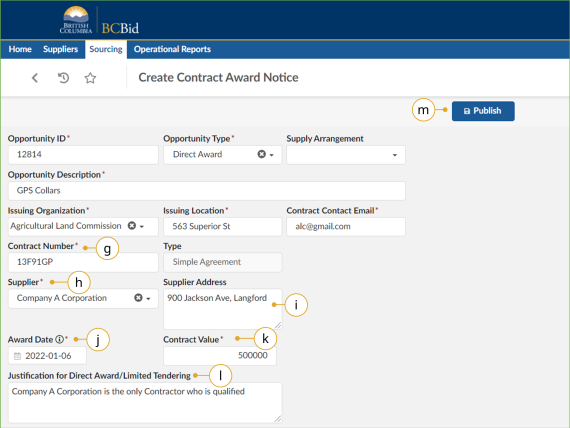
g. Enter the Contract Number.
h. Select the Supplier.
i. Enter the Supplier Address.
j. Select the Award Date.
k. Enter the Contract Value.
l. Enter the Justification for Direct Award/Limited Tendering.
m. Click Publish.
Printing Records
Print enables users to print a tab or the menu of an opportunity, or to save an opportunity as a PDF for records management. A Buyer, for example, may use the print function to save a copy of the internal and external communication for their records or FOI requests.
Click to enlarge image
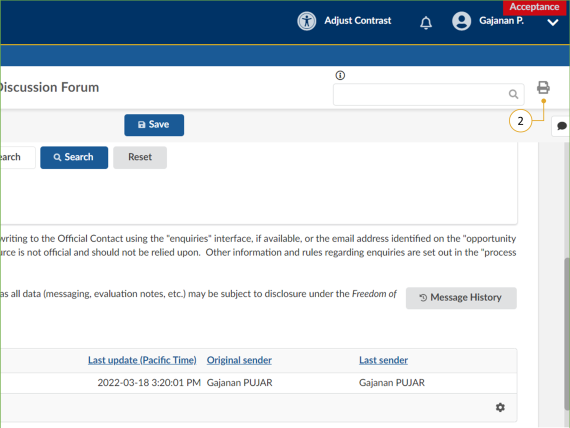
1. Navigate to the screen you would like to print.
2. Click the Print icon (top-right corner of the screen) to open the print version in a new tab in your browser.
Note: When archiving message data for an opportunity using Message History button, you will need the print out of each message plus the Excel file to establish who was sent each message. The message spreadsheet can be downloaded via the cog icon.
Click to enlarge image
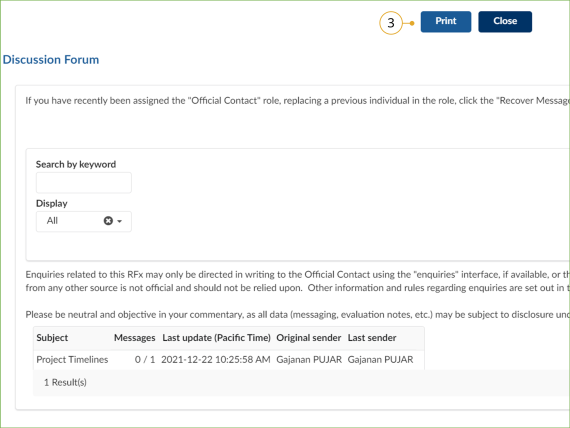
3. Click Print.
Note: Users should ensure that no changes are made on this screen.
4. In the dialog box, select the appropriate print settings and click Print.
Subscribe
Enter your email address to subscribe to updates of this page.

